
Creating a mod for Skyrim, Oblivion, or just about any other game can be a very messy, file-littering process. There was a time where I used to use the desktop for working space, and it worked well enough, except when I had to clean it off due to overcrowding. I often couldn’t remember what files were for what, and sometimes accidentally deleted files I otherwise needed.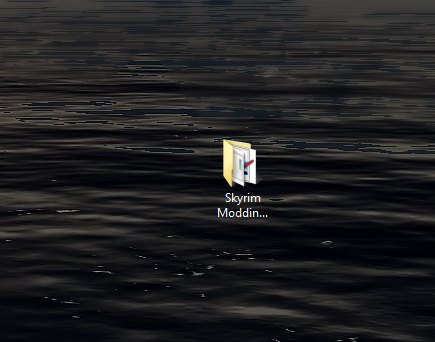
In order to have a functioning place on your computer, it’s wiser to create a hold-all folder where you store shortcuts to the tools you use and the folders you store your working files in. While writing the Adventuring in the Nif series, I came up with my simple, elegant solution, where before I usually stored project folders haphazardly and tool shortcuts on my desktop. “Why didn’t you read up on how to organize your working files?” Well, I tend to rely more on myself when I want to come up with something I’m comfortable with. I’m sure other people have come up with something similar. Anyway, I want to share this, because it’s useful.
- Create a folder. You can place it anywhere.
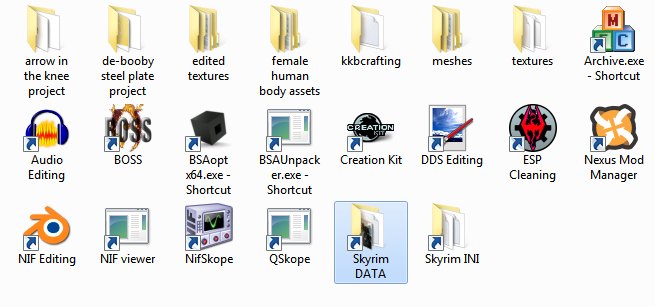
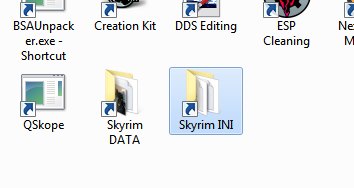
Personally, I prefer just creating it right on the desktop for ease of access, but you can have it someplace like C:\ or in your documents folder. If you place it somewhere, make sure you create a shortcut linking to it, and place it on the desktop if you want easy access to it. - Gather all the shortcuts to the tools you use, and place them in the folder. Here’s an example of the tools I have in mine.
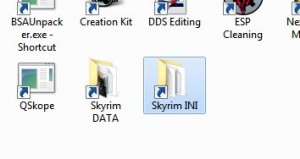
- Next, find your Skyrim folder, the one where it holds the EXE and Data folders. Create a shortcut to it and place it in your tool folder.You’ll want quick access to this during the course of your work, in order to test, get files to edit, and generally manage your mod folder if you don’t use a mod manager. I’ve labeled mine “Skyrim DATA” to differentiate the two Skyrim folders.
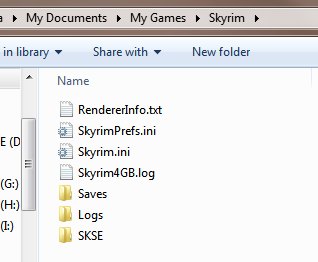
- Hunt down the other Skyrim folder.
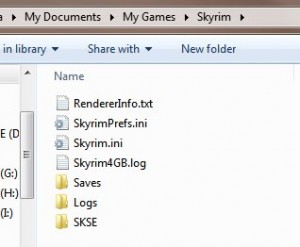 It should be in a place like “My Documents\My Games\Skyrim,” but different systems may have this placed elsewhere. It is the one that contains your Skyrim.ini and SkyrimPrefs.ini, along with your saves and any Papyrus logs you generate.
 - Next, if you already have projects scattered around or some place you stored your projects, just move them to the modding folder unless it would otherw
 ise be inconvenient. I prefer keeping all my projects in one place and don’t keep them stored in my Skyrim Data folder because I may lose them that way. Instead, I copy the files into the data folder for testing. When using the Creation Kit, this isn’t always possible to do. For things like ESP files ,you have to keep them in the Data folder to edit, but because you have a direct link to the Data folder, it shouldn’t be too hard copying the ESP and backing it up sequentially in the project folder.
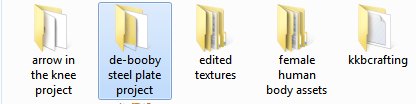
 - Whatever extracted BSA files you have, for meshes or textures or sound files, place the folders in the main modding tools folder for easy access. Keep them there in case you need a fresh copy.In the picture above. I have a folder dedicated to the female human body assets because I was using them a lot during my de-boobification of the steel plate project. A copy of the original nifs are in there, along with Blender-ready import versions, so I don’t have to go back and do it again any time I need a new skeleton or copy bone weights. As you can see, I subdivided the body into the _0 and _1 into import ready files, and created a set of .blend files of femalebody_0 with feet, hands, and head for future armor creating. The original, unedited nifs went into the original folder.
That should be about it for creating a good working folder. If you noticed, I had all my tool shortcuts renamed. This is for quick selecting, so I didn’t have to stop and think about what program I wanted to open. If I wanted to edit the nif meshes, I’d just find where it said nif editing and click. The other reason is sometimes I don’t use a tool very often and may have to try and remember what it does. This is especially useful if you take six months off and come back to realize you can’t remember what BSAextractervariety#400 you were using and liked better.
Now, you probably want a good list of programs to use. No problem.
- Audacity – Sound recording and editing
- BOSS – More of a general thing if you have a lot of mods. Orders mods to lessen conflicts and CTDS.
- Creation Kit – only available through Steam.
- Paint.NET – Has native DDS support with automatic mipmap generation. My choice in texture editing because I can’t stand GIMP and both GIMP and Photoshop require plugins.
- TES5Edit – Cleans plugins of “dirty” edits. If you’ve ever edited something by mistake or accidentally hit OK when you should have hit CANCEL, clean it with this. Useful for general purposes if you mod your Skyrim a lot.
- Blender 2.49b – Required for mesh editing. Nif importing scripts do not support other versions.
- Nifscripts for Blender – If you plan on editing nifs, you’ll need the Python programs listed there as well. DO NOT download the most recent versions, use only the versions listed as required on that page.
- NifSkope – For creating import ready and Skyrim ready nifs.
- BSAopt– BSA extractor to extract the default files.
As for that last one, that’s the one I prefer over the other BSA extractors, but there a lot of different BSA extractors out there. Try one you may like better.
This may be specific to Skyrim, but I’m sure you could use the same principles when creating mods for other games. You just need to know what tools to download, and what folders you need to edit. Happy modding!