Tag Archives: tutorial

NPC Editing: Fixing the Gray Face Bug

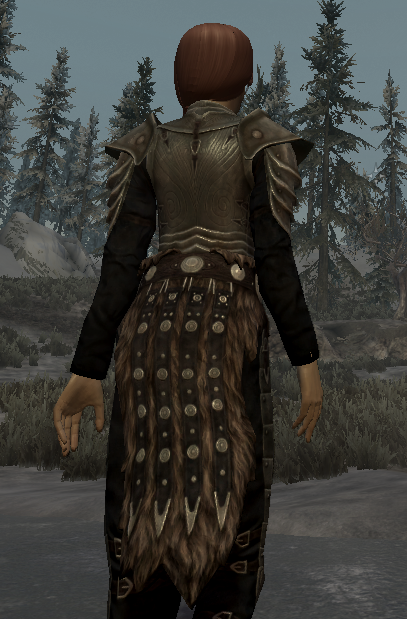
So you might have noticed the guy in the banner that pops up sometimes. The one that wears the tartan hood. He’s a follower I’ve been working on and I’ll say, it’s a pain in the butt to get the gray face bug fixed on a custom NPC.I created his face in the chargen and exported it the normal way using spf charactername in the console. Then I imported it through the NPC editor in the CK.(For the record, I have RaceMenu and Enhanced Character Edit installed, and I think his face port went juts fine using the SPF export straight from the game. He doesn’t look particularly different from how he did as a PC, but the real test will come if I disable the chargen mods.)

Everything looked pretty good, but I had a problem when it came to viewing him in the game proper, and that was the gray face. Googling around, I came across several scattered forum posts and the wiki, so I read up on it.

It’s because the CK doesn’t generate the head mesh for the NPC automatically. You have to do it yourself by selecting the NPC in the Item window, not the NPC edit window.

Selecting the NPC and hitting CRTL-F4 will generate the meshes and textures that will properly display the NPC in game without the pale look and neck seam.

But wait! Some of the tutorials don’t really specify the conditions where CK will actually export the darn things. I found this out from a forum post I’ve since lost, but anyway. For some reason, the CK won’t generate the files when you have the NPC selected through the ALL category in the CK, especially if you’re like me and tend to use the filter a lot in order to cut down on wild edits and just being about to find the right entry. The best bet is to go to where the NPC is listed normally, say if your character was a Nord, it would be in NordRace.

So select them, and CTRL-F4. CK will inform you it will start generating the files. Give it a bit. It will have a popup that says “done” when it is done, and it might take a bit depending on if you have multiple NPCs selected. Make sure that any previously generated files for your NPC are deleted if you are updating the face files! I’ve had the CK actually act like it’s exporting, but it really didn’t because the files were already there. You can tell when it does this: there will be a slight pause when it is actually generating, but when it isn’t the DONE popup will appear almost immediately.

A word of warning:

I have tried this successfully several times for my NPC, right up until I started giving him his custom hair.

Custom hair on an NPC requires a bit more involved work, and for this NPC I used Vie Male Hair Pack, which comes in a BSA and ESP respectively and is a pretty awesome addition for guys. They look a bit punkish but some ‘dos can also be used for Celtic NPCs like my guy up there. (Also, if you download it, remember to check for the password because Vie uses a secured archive.)

Following the ESM conversion method to get the hair listed in the CK so I could give it to my NPC, I also had to unpack the BSA file before the CK would generate the proper head mesh and textures, otherwise it gave me errors whenever I tried to view the hair in the NPC preview and it also gave me errors while generating the NPC meshes. In fact, prior to unpacking it wouldn’t even display the hairs in preview mode. There was the BSA archive right there! I have no problems with Apachii’s hairs but Apachii also provides an ESM out of the box… but I have no idea what’s going on there and will have to research further.

Anyway. Unpacking the BSA did the trick and made working meshes.

I believe when it couldn’t find the hair meshes in the loose files, it generated an NPC face mesh without the hair. He still had the gray face bug in this instance because in game he had the hair, but according to the CK he didn’t and that caused the generated face files to not match up.

It seems like any time the face files and the NPC do not match up, the gray face bug occurs as well.

After the CK finally found the loose hair meshes, and generated the face files properly with custom hair, he didn’t have the gray face bug.

Lastly, if you ever make an mod with an NPC, do not forget to generate the face files and include them with the proper file pathing in your zip file.

The files you can find in Data\meshes\actors\character\FaceGenData\FaceGeom\YOUR PLUGIN.esp\

and Data\textures\actors\character\facegendata\facetint\YOUR PLUGIN.esp\

Any time you make an edit to your NPC’s looks, you should generate a new face file.

You’d think this is something the CK would do on its own once you were done editing the guy, right?

I still have some testing to do to see if I can get things working fine with the BSA and ESP.

How to Create a Crafting Recipe

Crafting recipes are an important part of an armor mod, or useful tools for other types. Here’s a quick how-to on how to create one. Note that tempering items will be covered in another tutorial.

The basic steps, before we go into detail.

  1. Create recipe
  2. Decide what it produces
  3. Decide materials it requires
  4. Choose to make the recipe disappear when you don’t have the materials.
  5. Save.


Creating your recipe


  • Create your recipe: duplicate an existing one or create one from scratch.Before you can do anything, you first must create a new recipe. You can find recipes in the Object Window > Constructable Object.
    Image1

    You can find all crafting recipes and tempering recipes under this section. Tempering is a little bit different, so we want the recipes. I find it easiest looking for a recipe that’s fairly close to what my finished recipe will be. For instance, if I wanted to have an item that required five iron ingot and be workable from forges, I’d probably choose one of the iron armor or weapon items.

Image2

  • Give your new recipe a unique identifier, something like RecipeNameOfModItem.
    Personally, I usually go by the default naming scheme, especially if I’m doing a big crafting project, but ifs up to you if you want your recipes to display all together or with similar times.Image5
  • Choose your required items.
    Image6

    The required item list is where all the items you need to craft the recipe is located. You can add a new requirement by right-clicking in the Required Item List and selecting New. Highlight the new addition. To change the default item, use the drop down menu to the right and find the item you want. Change the number required just below.
  • Change the created object.
  • Image8
    You can also change the number of items created just below. It’s fairly straightforward.
  • If you want this recipe to be creatable from another option, like the alchemy table, change the workbench keyword.
    Image9


Making a recipe appear only when you have the right materials

Next, consider adding conditions to the recipe that hide it in the crafting menu until you have the items required for making it. This reduces clutter in the crafting menu, especially since so many crafting mods don’t do this, resulting in very cluttered crafting categories. If this is an option you wish to implement, consider adding an in-game book listing all of the recipes that are available in your mod for easier discovery and use. 
Image10

  • Look below where it says “Match conditions” and right-click, add new.
  • Change the condition function to GetItemCount
  • Click the button where it says INVALID. That’s the function info. Click it and select one of the required items in the recipe.
    Image13
  • The Comparison menu has a list of “greater than” “less than” “equal to” et ctr items. What you’ll want is the “Equal to or greater than” function.
  • Change the value to the number of items you want in your inventory before the recipe will show up.
    Image14

You can customize this so you can have your recipe show up when you have only one of the required items or only show up until you have all of the required materials and are ready to create it. Add more conditions for each item.

And that’s it! Stay tuned for Tempered items.

Tips for Creating an Effective Skyrim Modding Workspace

Creating a mod for Skyrim, Oblivion, or just about any other game can be a very messy, file-littering process. There was a time where I used to use the desktop for working space, and it worked well enough, except when I had to clean it off due to overcrowding. I often couldn’t remember what files were for what, and sometimes accidentally deleted files I otherwise needed.skyfold1

In order to have a functioning place on your computer, it’s wiser to create a hold-all folder where you store shortcuts to the tools you use and the folders you store your working files in. While writing the Adventuring in the Nif series, I came up with my simple, elegant solution, where before I usually stored project folders haphazardly and tool shortcuts on my desktop. “Why didn’t you read up on how to organize your working files?” Well, I tend to rely more on myself when I want to come up with something I’m comfortable with. I’m sure other people have come up with something similar. Anyway, I want to share this, because it’s useful.

skyfold3

  • Create a folder. You can place it anywhere.
    Personally, I prefer just creating it right on the desktop for ease of access, but you can have it someplace like C:\ or in your documents folder. If you place it somewhere, make sure you create a shortcut linking to it, and place it on the desktop if you want easy access to it.
  • Gather all the shortcuts to the tools you use, and place them in the folder. Here’s an example of the tools I have in mine.skyfold4
  • Next, find your Skyrim folder, the one where it holds the EXE and Data folders. Create a shortcut to it and place it in your tool folder.You’ll want quick access to this during the course of your work, in order to test, get files to edit, and generally manage your mod folder if you don’t use a mod manager. I’ve labeled mine “Skyrim DATA” to differentiate the two Skyrim folders.
  • Hunt down the other Skyrim folder. skyfold5It should be in a place like “My Documents\My Games\Skyrim,” but different systems may have this placed elsewhere. It is the one that contains your Skyrim.ini and SkyrimPrefs.ini, along with your saves and any Papyrus logs you generate.
  • Next, if you already have projects scattered around or some place you stored your projects, just move them to the modding folder unless it would otherwskyfold6ise be inconvenient. I prefer keeping all my projects in one place and don’t keep them stored in my Skyrim Data folder because I may lose them that way. Instead, I copy the files into the data folder for testing. When using the Creation Kit, this isn’t always possible to do. For things like ESP files ,you have to keep them in the Data folder to edit, but because you have a direct link to the Data folder, it shouldn’t be too hard copying the ESP and backing it up sequentially in the project folder.
  • Whatever extracted BSA files you have, for meshes or textures or sound files, place the folders in  the main modding tools folder for easy access. Keep them there in case you need a fresh copy.In the picture above. I have a folder dedicated to the female human body assets because I was using them a lot during my de-boobification of the steel plate project. A copy of the original nifs are in there, along with Blender-ready import versions, so I don’t have to go back and do it again any time I need a new skeleton or copy bone weights. As you can see, I subdivided the body into the _0 and _1 into import ready files, and created a set of .blend files of femalebody_0 with feet, hands, and head for future armor creating. The original, unedited nifs went into the original folder.

That should be about it for creating a good working folder. If you noticed, I had all my tool shortcuts renamed. This is for quick selecting, so I didn’t have to stop and think about what program I wanted to open. If I wanted to edit the nif meshes, I’d just find where it said nif editing and click. The other reason is sometimes I don’t use a tool very often and may have to try and remember what it does. This is especially useful if you take six months off and come back to realize you can’t remember what BSAextractervariety#400 you were using and liked better.

Now, you probably want a good list of programs to use. No problem.

  • Audacity – Sound recording and editing
  • BOSS – More of a general thing if you have a lot of mods. Orders mods to lessen conflicts and CTDS.
  • Creation Kit – only available through Steam.
  • Paint.NET – Has native DDS support with automatic mipmap generation. My choice in texture editing because I can’t stand GIMP and both GIMP and Photoshop require plugins.
  • TES5Edit – Cleans plugins of “dirty” edits. If you’ve ever edited something by mistake or accidentally hit OK when you should have hit CANCEL, clean it with this. Useful for general purposes if you mod your Skyrim a lot.
  • Blender 2.49b – Required for mesh editing. Nif importing scripts do not support other versions.
  • Nifscripts for Blender – If you plan on editing nifs, you’ll need the Python programs listed there as well. DO NOT download the most recent versions, use only the versions listed as required on that page.
  • NifSkope – For creating import ready and Skyrim ready nifs.
  • BSAopt– BSA extractor to extract the default files.

As for that last one, that’s the one I prefer over the other BSA extractors, but there a lot of different BSA extractors out there. Try one you may like better.

This may be specific to Skyrim, but I’m sure you could use the same principles when creating mods for other games. You just need to know what tools to download, and what folders you need to edit. Happy modding!

The Hi-Res Texture Pack

I downloaded Skyrim’s free Hi-res texture pack shortly after it first came out. I enjoyed the better resolution for months, when I actually played Skyrim. Unfortunately, a problem struck about a month or so ago when one of the mods I had did something rather… uh weird, to some of the torches about Skyrim.

I still have yet to figure out what mod it was. I can only think it was one of the ember mods I had installed just prior to encountering the bug. What it did was turn several torches, candles, and braziers into the complete opposite of what a light source should be- it was more like a magical device tapping into a back whole which sucked all light away and became a “black void radiator” instead of a photon radiator. It was bizarre and affecting my ability to play.

I started uninstalling the most recent mods- no fix. Then I went and uninstalled the less recent mods- still no fix. I said “Screw it,” and stripped the game of all mods- including the Hi-Res packs by accident.

Well, it fixed it when whatever files responsible were finally deleted, and I had my light back. At least I didn’t have to re-install the game! But then I had to clean up and reinstall the mods bit by bit… and I started getting that weird floating grass bug which I fixed. I think. (Check Modding Resources from the menu if you also have this bug.) Anyway, during this, I managed to iron out the incompatibilities between the mods I use the most and install a few more that were pretty awesome.

Unfortunately, I wondered why my textures were so low now. Then I realized just a bit ago the Hi-Res packs disappeared.

A thorough search about how to re-install the Hi-Res pack produced results- for removing it. Not what I wanted. Uh. Okay. So anyway, I tried fixing it on my own. Just opening the game through Steam didn’t work, despite what others mentioned (note that I usually launch Skyrim using SKE). The only other thing I could do was a bit more technical. Usually, when something is wrong with the default game files, you do a cache verify. So I opened up Steam again, right clicked Skyrim in my library, and did one. Lucky me, it detected the Hi-Res packs were gone and slated them to reacquire. The Hi-Res is downloading even as I type, but again, it’s taking it’s sweet time.

Oh, there, it’s done. Actually, it seems to have freshly downloaded the DLCs as well, and BOSS informs me that I have to reclean the ESM files, but a small price to pay for the better resolutions.

Anyway, the moral of the story is clear; trying to fight your way out of darkness may leave causalities.

Adventuring in the Nif – Homecoming

I hadn’t intended on writing a Part 8 to this series, but after setting down the blog and starting the journey over from scratch, let me tell you: it took only an hour or two this time.

I imported the fresh mesh to edit, flattened the chest out again, and this time edited the UV map. It had been a while since I’d done a UV map, so I lingered on that part getting the texture to flow smoothly again. It didn’t require much tweaking because it had only deformed slightly.

When I was done, I went through the process to export it. For a while there I had some trouble getting Blender to import a clean skeleton- for some reason it kept importing a dirty skeleton no matter how many times I closed it out. Either way, I got it working again, and exported my Plate Take 2 mesh.

It worked perfectly! Well, almost perfectly. The ankles and wrists no longer were intensely huge. I tried the mesh out in Skyrim, running, jumping, and walking, with a few other poses, and it- hmm. It was doing that stretching clipping on that flappy skirt thing the plate armor has.

clippging

I knew what the problem was. The bone weights were off, so I went back and redid the mesh a little bit so the weight painting wasn’t so red- I created a smooth transition along the flappy thing. Exported, and tested it out. It was better, but there was still something wrong with it…

To have a basis of comparison, I exited Skyrim and removed the edited mesh. Then I loaded it back up and watched how the default plate armor moved. That was when I realized, “Of course! The plate armor had all those extra bones on its skeleton.” The flap had been assigned to an entirely different set of bones. I should have realized it earlier because I had this exact same problem in modding for another game.

It was easily fixed, actually. I went back into Blender, deleted all of the vertex groups, deleted the skeleton I had imported, and started the bone weight copy again, but this time with the original nordplatef. I copied the bone weights, and then imported a clean skeleton from nordplatef instead of femalebody.

I exported the whole kaboodle and plopped it into the data folder.

nomoreclipping

It worked (mostly) perfectly.

Satisfied, I started back, ready for another good night’s sleep.

There is some clipping at the wrists and ankles, especially if you’re wearing a non-steel plate bracer and armor, but I noticed that was a problem on the original mesh when I was doing my research. I’ve never seen any character in game wear anything but a full set of plate armor,  however, so I’m wondering how worthwhile it will be to fix what the default mesh had wrong with it.

There’s a few bone weights I want to adjust for a more smooth flop to the skirt bone before I start working on retexturing this thing, but that is as it stands at this moment, and my adventure, for the moment, is done.